|
|
Post by linkous on Mar 28, 2017 6:28:27 GMT
Heavy one, I guess, Pete?  Yesterday I made this tailpiece-hand rest combination, because a hubcap resonator cone prefers no coverplate..  Em. |
|
|
|
Post by linkous on Mar 27, 2017 6:55:38 GMT
 Interlude.  Removing the inside steel ring of an old hubcap  Resulting in a light aluminum resonator cone of 145 gram..  For a wine box guitar project in between.. Em. |
|
|
|
Post by linkous on Mar 24, 2017 8:12:54 GMT
I don't like all these (hidden) screws and position markers on the fretboard, Pete. I try to fix the problem with a wedge that is glued underneath the top, so the gap between fretboard and top closes automatically when the neck stick is pushed into the guitar body (see a previous reaction on march 11).
I think about a hole in the soundwell ring to access the truss rod, but until now I don't find a wrench that is long enough..
Em.
|
|
|
|
Post by linkous on Mar 22, 2017 8:10:56 GMT
 Preparing the fretboard.  25 Inch.  Routing out the headstock slots.  And truss rod channel.  No truss rod access hole in the headstock  I prefer adjustment from the side of the heel.  Underneath the fretboard.  Love this basic tuning machines.  No pictures about, but I prefer to install the frets before gluing the fretboard.. Em. |
|
|
|
Post by linkous on Mar 11, 2017 14:19:18 GMT
 Planing the neck  To the right neck angle (I hope).  To fill the gap between top and fretboard  A wedge is glued underneath the top.  Scarf joint set up.  Headstock gluing set up.. Em. |
|
|
|
Post by linkous on Mar 3, 2017 13:38:52 GMT
 Some scrap wood from an old table.  Oak.  Fitting a hole for the neck stick.  Neck and stick = one piece  aka the rifle.  Creating the neck by gluing side pieces. Em. |
|
|
|
Post by linkous on Feb 14, 2017 7:40:58 GMT
 Preparing the side(s)  And popping the first rivets.  Going faster than expected.  Gluing the neck block with polymer glue, tail block is done already (picture above). Em. |
|
|
|
Post by linkous on Feb 10, 2017 7:20:51 GMT
I share your opinion about the decorative aspect of a rivet, Pete..
Em.
|
|
|
|
Post by linkous on Feb 9, 2017 10:43:18 GMT
The plan is not to braze, weld or solder this body, Pete, I'm thinking more about a 'mechanical' way..
To be continued..
Em.
|
|
|
|
Post by linkous on Feb 8, 2017 10:43:26 GMT
 Aligning top and back on the go-bar deck  And fitting a neck- and tail block. Em |
|
|
|
Post by linkous on Feb 1, 2017 8:54:37 GMT
 Cutting out the sound well ring  And glue the ring in place on the go bar deck.  First with some drops of CA glue  And a second time with polymer glue. Em. |
|
|
|
Post by linkous on Jan 24, 2017 8:34:42 GMT
 Template number #5   And a strip of aluminum  Which turned out too short..  This ring  Must keep the sound well in shape.  And that seems to be going well.. Em. |
|
|
|
Post by linkous on Jan 17, 2017 10:42:49 GMT
 F-holes  In many different shapes  I like these.. Em. |
|
|
|
Post by linkous on Jan 9, 2017 7:49:33 GMT
 More templates  To strengthen the back of the guitar.  Hammering the arch.  Not perfect (a bit wavy), but I think it will match with the rest of the guitar.. Em. |
|
|
|
Post by linkous on Jan 3, 2017 9:00:43 GMT
After building a lap steel from an old violin case  And a Toolbox Tricone  Now I want try to make a real steel body resophonic:  Starting with some templates.  Steel.   And hammering.  A lot of hammering. 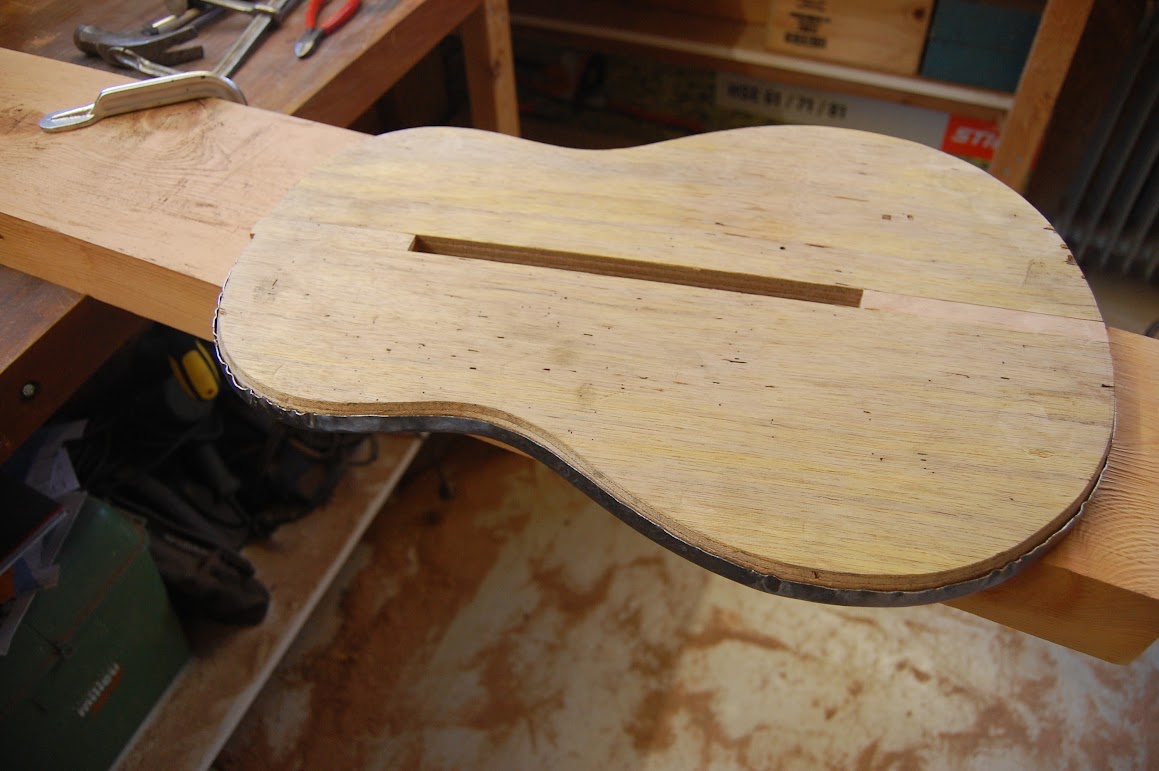  Part I Em. |
|

